KK Empire Tradess Limited supplies waterproofing sealants and tile adhesive in Kenya, with countrywide delivery and WhatsApp ordering. Browse our adhesives & sealants or message us for prices.
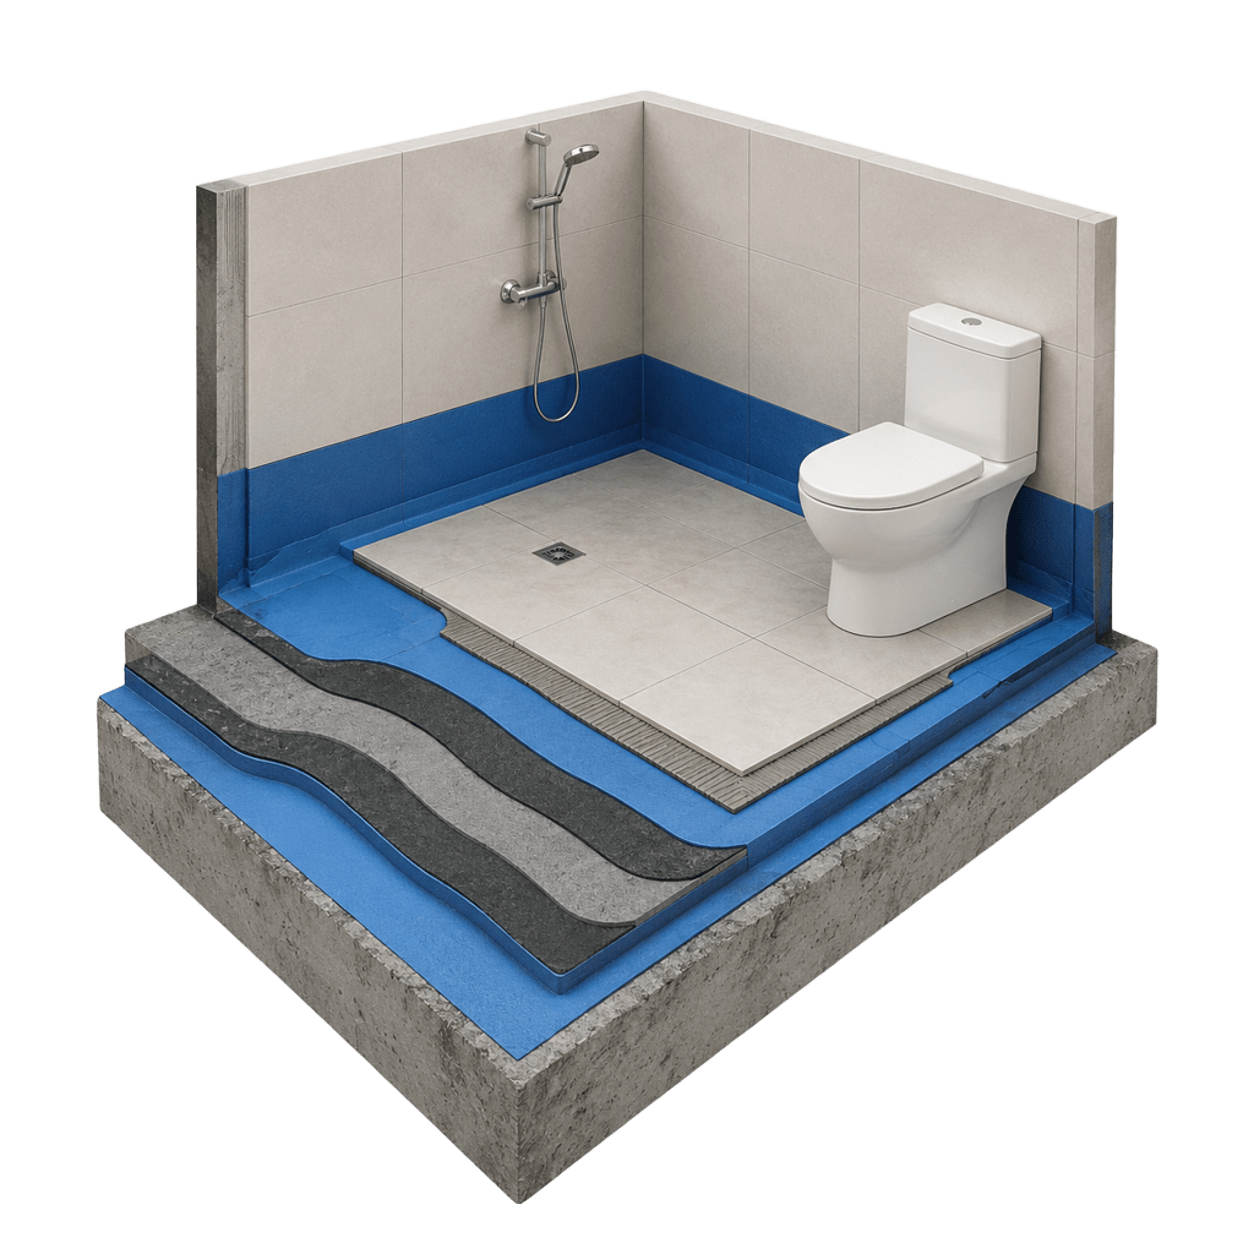
Bathroom waterproofing creates a protective moisture barrier beneath tiles, preventing water from penetrating walls, floors and structural surfaces. It is one of the most important preparation steps before tiling because tiles and grout alone do not make a bathroom completely waterproof.
Many homeowners focus heavily on choosing attractive bathroom tiles, modern sanitaryware and stylish fittings but overlook the hidden layer that protects the entire installation. Bathroom waterproofing is the process of applying specialised waterproof membranes, coatings and sealing systems before tile installation to prevent leaks and moisture damage.
In Kenya, bathroom waterproofing is especially important because bathrooms experience daily exposure to water from showers, baths, cleaning activities and plumbing fixtures. Without proper waterproofing, water can move through grout joints, tile gaps, corners and pipe penetration points, eventually causing dampness, mould growth and structural damage.
A well-installed waterproofing system helps protect:
- Bathroom floors
- Shower areas
- Wall corners
- Pipe outlets
- Tile adhesive layers
- Adjacent rooms and ceilings
For apartment owners in Nairobi, poor bathroom waterproofing can lead to water stains appearing on ceilings below bathrooms. In coastal regions such as Mombasa and Malindi, humidity increases the importance of moisture protection because trapped water can accelerate mould growth and deterioration of building finishes.
KK Empire Trades Limited helps homeowners and contractors select suitable bathroom renovation materials, including tiles, sanitaryware and related construction supplies. Explore available renovation products through the KK Empire Trades Limited shop.
Understanding Bathroom Waterproofing Systems Before Tile Installation
A bathroom waterproofing system uses waterproof membranes, primers, sealing tapes and protective coatings to stop moisture from reaching the building structure. The correct system depends on the bathroom area, substrate condition and type of tiles being installed.
A common misconception is that ceramic or porcelain tiles automatically prevent water penetration. While quality tiles have low water absorption, the joints between tiles and areas around pipes can still allow moisture movement.
A complete bathroom waterproofing system normally includes:
| Component | Purpose |
|---|---|
| Waterproof membrane | Creates a moisture barrier below tiles |
| Primer | Improves adhesion between substrate and waterproof coating |
| Waterproofing tape | Reinforces corners and movement joints |
| Sealant | Protects pipe penetrations and gaps |
| Tile adhesive | Secures tiles after waterproofing |
Professional installers usually apply waterproofing before tiling in areas exposed to continuous water, especially:
- Shower floors
- Shower walls
- Bathroom floors
- Bathtub surrounds
- Wall-floor junctions
- Plumbing connection points
Types of Bathroom Waterproofing Materials
Different waterproofing products are available depending on project requirements.
Cementitious Bathroom Waterproofing
Cementitious waterproofing is one of the most commonly used solutions for bathrooms because it is easy to apply and compatible with tile installation.
Benefits include:
- Good adhesion to concrete and cement surfaces
- Suitable below ceramic and porcelain tiles
- Effective for wet areas
- Practical for residential renovations
This system is commonly used in Kenyan homes because many bathroom floors and walls are constructed using cement-based substrates.
Liquid Membrane Bathroom Waterproofing
Liquid waterproofing membranes are applied as a coating that dries into a continuous protective layer.
Advantages include:
- Covers irregular surfaces
- Reduces weak points
- Works around corners and joints
- Suitable for shower areas
Liquid membranes are useful when creating a seamless waterproof layer before installing decorative bathroom finishes.
Waterproofing Tapes and Joint Reinforcement
Corners and movement joints are common areas where water can penetrate.
Waterproofing tape helps reinforce:
- Wall-to-floor corners
- Shower corners
- Expansion areas
- Pipe entry points
These areas require additional attention because movement in buildings can create small cracks over time.
Bathroom Waterproofing Preparation Steps Before Applying Membrane
Proper surface preparation determines the success of bathroom waterproofing. A waterproof coating applied on dusty, uneven or damaged surfaces may fail even when using quality products.
Before applying waterproofing materials, contractors should prepare the substrate carefully.
Step 1: Inspect the Bathroom Surface
The installer should check:
- Existing cracks
- Uneven floors
- Loose cement
- Old adhesive residue
- Water damage
- Pipe penetration areas
Any structural issues should be corrected before waterproofing begins.
Step 2: Clean the Surface Thoroughly
The surface should be free from:
- Dust
- Oil contamination
- Loose particles
- Construction debris
A clean surface allows the waterproof membrane to bond properly.
Step 3: Repair Cracks and Uneven Areas
Small cracks can become pathways for water movement.
Repairs may include:
- Crack filling
- Surface levelling
- Joint reinforcement
- Additional waterproofing tape
Bathroom Waterproofing Application Process: Step-by-Step Guide
The bathroom waterproofing process involves preparing the surface, applying primer, sealing vulnerable areas, installing the waterproof membrane and allowing proper curing before tiling. Following each stage correctly improves long-term bathroom performance.
A professional installation follows a controlled sequence.
Step 1: Apply Waterproofing Primer
Primers improve bonding between the substrate and waterproof coating.
A suitable primer helps:
- Reduce surface absorption
- Improve coating adhesion
- Create a stable base
Step 2: Seal Corners and Penetrations
Before coating large areas, installers should reinforce vulnerable points.
These include:
- Shower corners
- Floor drains
- Water supply outlets
- Pipe openings
Step 3: Apply Waterproof Membrane Layers
The waterproof coating is applied evenly across the required areas.
Important considerations:
- Correct thickness
- Complete coverage
- Proper drying time
- Manufacturer instructions
Applying too thin a layer may reduce protection, while poor curing can affect tile installation.


